![]()
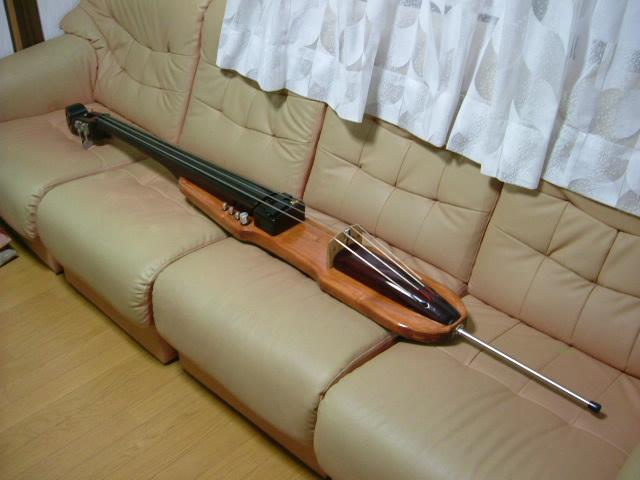
My first homebuilt BASS
Here is a document of making my electric upright bass.
to Home
Tools for making bass 3D-CAD pics of my bass
A spell of Frets
For a person who plays guitar, a inferiority complex about "fretless" instrument is common, isn't it?
Of course, I have the same feeling.
Especially about me, I have a bitter experience. When I was young, I bought a violin for country music. However I could not master it at all.
Even now, it is my big trauma.
I play bass guitar
in my band. One day, a friend of mine told me to try fretless bass.
It was the first time for me to play it. But then, I found I could play it.
After that, I tried to play big old contrabass which was left in
our studio.
"Oh! It isn't so difficult!" It was my impression at that time.
"Upright"
is attractive (What does it mean?)
About that time, we went the concert of "GONTITI" as an event of
summer festival at Takatsuki city. Their guitar play was amazing. I reconfirmed
the big difference between professional and amateur. Anyway, then I was
fascinated to their Bass. It was a kind of "EUB". I didn't know its
name and brand at all. But the sound, stiff, heavy and neat like a wood bass,
fascinated me very much. And especially its exterior looks were so attractive.
Carruthers !
Since then, I had
been looking for "EUB" in the internet or book
"Bass-magazine" etc.
I thought that one of the best was TOKIE's Carruthers bass.
The design was not so special, but its sophisticated body expresses high
quality.
At the same time, I became a fan of TOKIE.
How much is it? Wow! 540,000yen!!!!!!!!!!!!!!!!!!!!!!!! This price is too far
from an weekend player like me.
I thought it was better to buy FENDER's jazz bass.
Although I play bass in my band, basically I think I am an guitarist,
I have only one bass guitar YAMAHA's MB-40. It's a cheap article.
Notes: About the guitar, I have Martin, Fender, Ibanez, Morris, and Yamaha
SG-1000.
I
can't buy it. But.......
I gave up buying it, but I couldn�t restrain longing for TOKIE.
One day at a musical instrument store, when I was stroking the displayed "EUB", I thought I may craft it by myself.
In these 20years, I crafted many things for my wife and daughters. For example, a bunk bed, doll's house, a jewel box, a dining bench, etc.
I thought I should craft it for myself this time.
Drawing
Soon I started to gather many information about EUB.
I visited so many web sites and downloaded many kinds of photos, and printed out them, and measured by ruler.
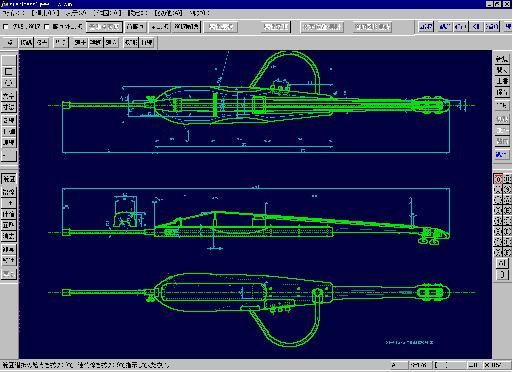
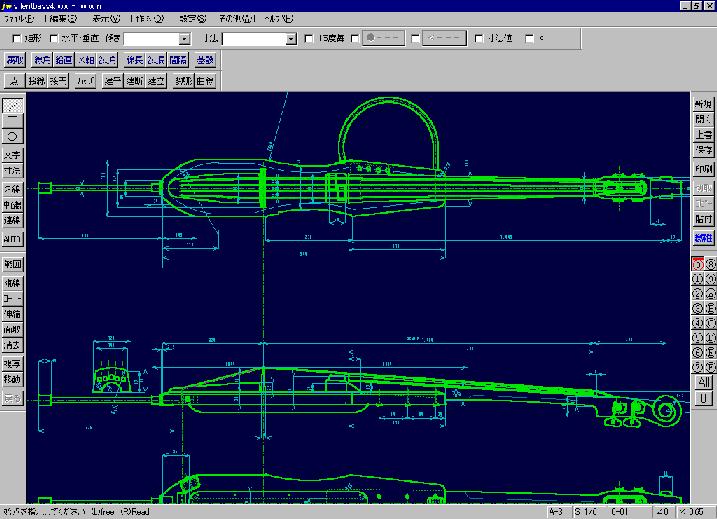
After that, I started to design and shape it using CAD software (It was free!).
It was
December 2002. Here is the drawing by "JW-CAD"
Because of last winter was rather cold, it was May 2003 when I started to work.
My workshop is outside. Practically it's a parking lot of my house.
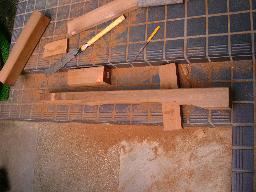
Materials
I had gotten a lot of knowledge of materials for EUB from internet site.
For example, Finger board = ebony, Neck= mahogany, Body= spruce.
But I couldn't get such materials in the neighborhood. We don't have any shop
which is selling such a special wood in Takatsuki.
Soon, I changed my mind, I bought a following substitute.
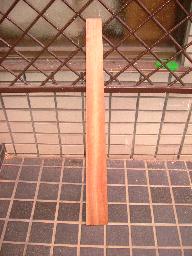
1. Red spruce for the neck (90x90x1800mm)
I chose the hardest and red one from big woodyard of KONAN.
2. SPF wood for the body (38x180x900mm)
I didn't know what SPF was. Somebody said S=spruce, P=pine tree, F= Fir tree.
I wanted 50mm thick timber for the body, but I got only 38mm one at the shop.
3. Red lauan for the finger board (20x90x900)
I chose hardest one from stock.
4. Ebony for the upper bridge (8x40x200mm)
Ebony is too expensive. It's enough for only the bridge.
Speaking truthfully, I wanted it for the finger board.
5. Maple tree for the lower bridge (15x120x200mm)
White wood is suitable for the lower bridge.
Change
of design
Because I couldn't get 50mm thick timber for the body, I needed to change my
design a little.
Endpin: Adjustable and retractable ---> Detachable
Volume and tone knob: Side ---> Front
Strings fixing: Bridge on top ---> Through the body
Following picture is after of the change.
And I used 3D-CAD software "Solid Edge" to make a
decision of body shape too.
3D-CAD pics of my bass
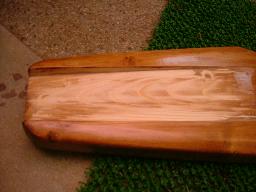
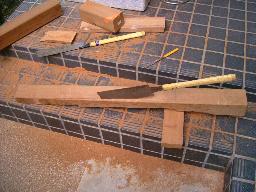
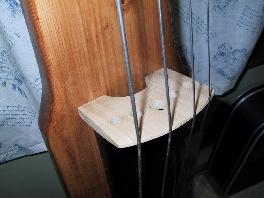
Body
Apr.2003. It was the day of starting to make it.
I started from the body, because it seems to be difficult to shape the neck.
![]()

Then I thought to take a photo of my work. And I did it. Upper two photos.
After that, I had been very busy for my actual job. So, I had to stop the work
for a month.
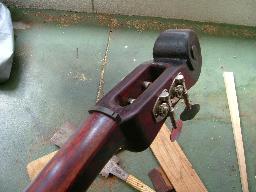
A month later I restart. Next work is a groove to set a neck.
If it has a gap between neck and body, the sound will be bad.
I needed to process it so carefully.
(A groove to set the neck)
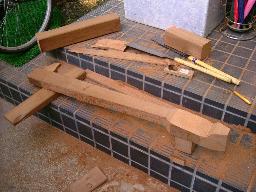
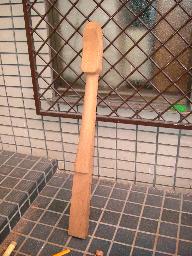
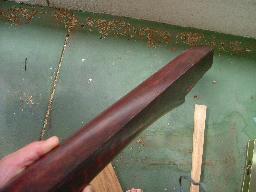
Neck
was neck.
The next work was neck. Really, neck was neck of my job.
The material red spruce was not so hard compared with mahogany,
but it was so hard work to shape by hand job only.
I think I got good muscle with my arm through this work.

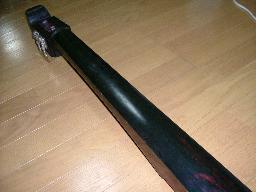
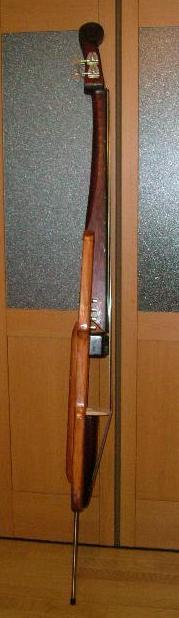
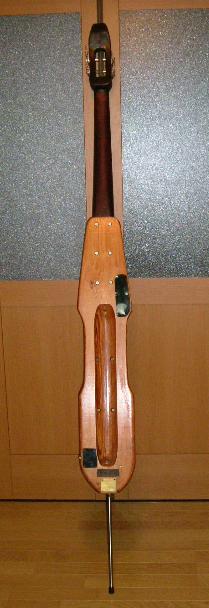
Side view
Top view
After rough cut by the saw, I used a file(rasp) and a plane(shaver) for
detailed work.
As a file made so loud noise, I was afraid a neighbor claimed to me.
But it was no problem.
Head
I had not decided for a long time that I should put a truss-rod into the
neck or should not.
Making a long and deep groove to set a truss-rod is very difficult
especially by hand.
Finally I chose "truss-rod-less", and I decided to make the neck
thicker(about 10mm)
instead of the truss-rod.
Neck
It was one of the hardest work for me to shape the neck.
I used a chisel and engraving knives.
It was summer when I working at a veranda for the neck, and I was bitten by so
many mosquitos.
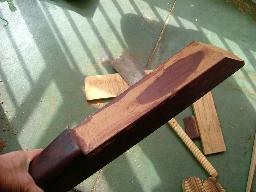
Finger
board
I think the fingerboard is the most important part for such a fretless
instrument.

Finger board , from rectangular to trapezoid and round.
Next job is gluing the neck and the finger board.
The best bonding agent is natural glue, but I didn't know where I can get
it,
I used ordinary chemical bond for wood.
I wanted to use vices, but I didn't have them in my tool box.
So I used a rubber band for bike and a weight to bind them.
This weight is Fender's amplifier.
Gluing the neck and the finger board
Accessories
Most of them were gotten from the internet auction.
1. Strings: New, Made in China. EAGD set \3800
2. Pegs: Used, 1 set for jazz bass \1000
3. Pick up: Used, YAMAHA's two pieces type \1500
It needs two pieces type for round of string's position.
4. Plug: I remove it from an old mixing machine \0
5. Volume pot: New, 6 pots set \1500
Total was about \8000 !!!!
Painted!
<Paints> See "Tools"
1. Varnish for Body (Maple color)
2. Oil stain for Neck (Mahogany color)
3. Varnish for finger board (Walnut color)
4. Lacquer for finger board (Black)
5. Lacquer for body (Clear)
As I couldn't get ebony color varnish, I made it mixing 3 and 4.
I had a try to paint at the surface which would be hide body and neck.
It was OK!
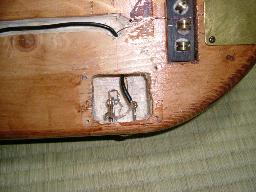
Details
and Bridge
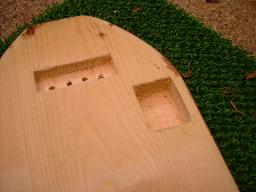

Holes for strings, plug and volume pots

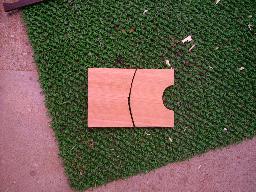
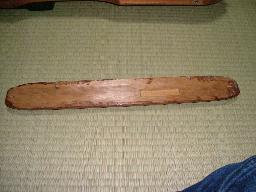
Material for bridge
Gluing to the body after painting. After that, I made four holes to pass the
strings.
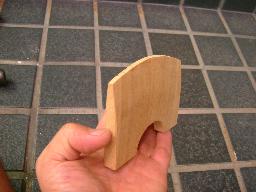
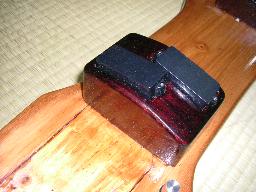
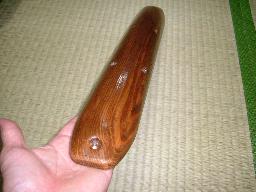
Pickup
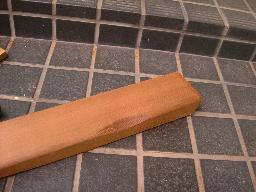
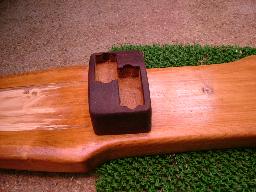
holder
Unexpectedly, I needed a long time to make a holder for pickup.
The most difficult point was to make a hole to fit the shape of pickup.

 �@
�@
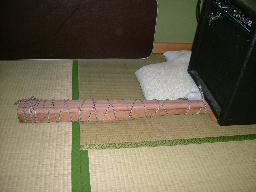
Lumber for pickup holder
My wife shouted. "Oh! How big it is! Where do you keep it !!!!"

Temporary assemble
Nut
and bridge
Nut was made of ebony. It was so hard to cut.
Nut before processing the slits for strings
Bridge was relatively easy, as I chose simple shape.
 �@�@
�@�@
Bridge
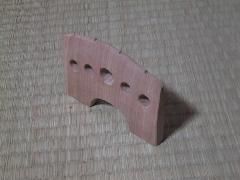
Five holes by drill
Can
It make sound?
I had been worried about the strings. Because there were for only
pure ContraBass.
Is it possible that magnetic pickup for electric bass pic up sound from
these strings?
For example, Carruthers's
EUB has a piezo-type pickup under the bridge.
If my magnetic pickup can't make any sound, my daughters will laugh at me!
Therefore I have to check it.
I strung one of them on YAMAHA's electric bass, and I flicked it by pick.
It was strange sound, but it was a sound. Probably OK.
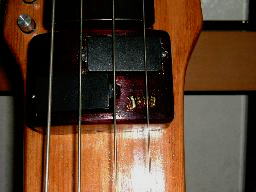
Pickups
and Volume pots
Pickups were mounted on the holder using long screw.
It's important that keep elasticity of urethane-foam under the pickups.
The knobs had been used for Victor's old amplifier "JA-S8".
 �@�@
�@�@
Pickups and volume pots
Paint
for finishing
At last it's the time for finish. I used a paintbrush for all parts.
Before painting, I removed all accessary parts.
An emulsion paint for body is easy to paint by brush.
But an oil-based paint for neck is difficult a little because it
is sensitive to temperature.
Neck after finishing paint
Other
detailed parts
Oh! I had to make so many things.
Cover of pots hole
1mm thick vinyl chloride plate can be cut with scissors easily.

Nut from back side (made of ebony)
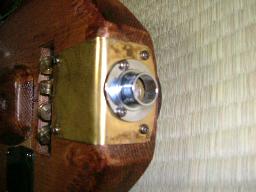
End pin holder
Yellow plate is 1mm thick brass.
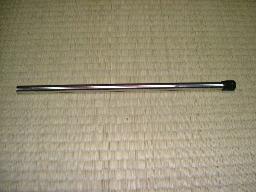
End pin
13.8mm diameter stainless steel pipe with rubber cap.
 �@�@
�@�@
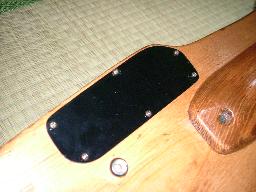
Back cover, It reinforces the body.
This lumber had been used for legs of my daughter's bed.
Electrical wiring around output jack
I went Ishibashi-gakki in kobe
to buy a condenser(capacitor) for tone control.
It was only 200yen, traveling expenses for Hankyu line was rather expensive.
By the way, I looked at EUB (Aria, Yamaha, etc.) again. Oh! It was
really Professional's work. So beautiful.
It's OK. I am an amateur.
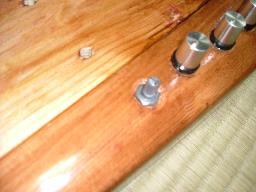
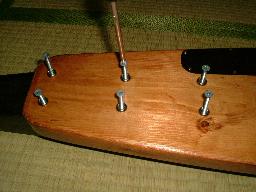
Setting
of neck
Finally, setting the neck. Screw size were 4.5mm diameter and the hole was
5.0mm.
I used 6 screws with concave washers.
 �@�@
�@�@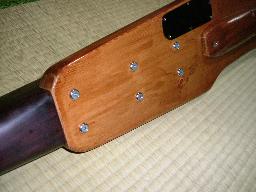
Setting of the neck

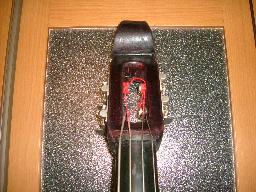
After
Sounded!
It's the time to string !
 �@�@
�@�@ �@
�@
Through the body from back
Bridge
It was the first time for me to string such a long Bass. I was very strained
when I turned the pegs. On the way, I flicked first string. It makes rather
deep sound. I connected to the amplifier as soon as I have finished tuning. It sounded!
And its sound was great. I was really happy.
After that, I tried to play my favorite song "San Francisco Bay
Blues".�@
It was just as I had expected that the thickness of the neck was on my mind a
little.
I thought I had better shave the neck more,
But I had to paint again, and it was a big trouble for me.
I expected to be acclimated to my hand. Indeed, it�s coming to me now.
Finally, It was on September 20th. It means I need 9
months to make it.
On next Saturday, I showed it to the members of my band.
As I had kept it secret, all of them were surprised at it.
Satisfaction! !
How
is quality of sound?
Well, about the sound. It's rather good sound through our favorite amplifier
"Fender Bassmann100".
The pickup was not so expensive. But I think 1050mm super long scale makes
heavy sound.
And it has mellow tones too like a double bass.
It's difficult for me to play on high position, I think I will do it.
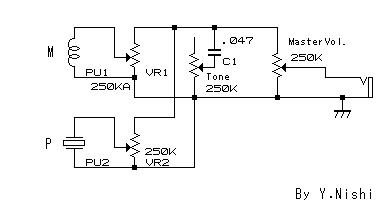
And now, I am looking for piezo type pickup to set on bridge to extend a
variety of sound.
That's why I had prepared two pairs of circuits for tone and volume.
But the pickup is extremely expensive. Shall I find substitutes for them?
Recently, I put a gold emblem on the pickup holder.
It isn't "BRAND" but only my initials.
Logo of my initials
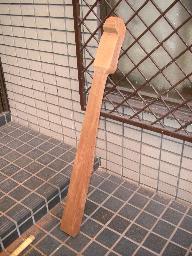
Fine
 �������
 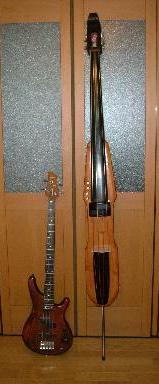 ��������
Side view ----- Compared with Yamaha MB-40 ------ Back view
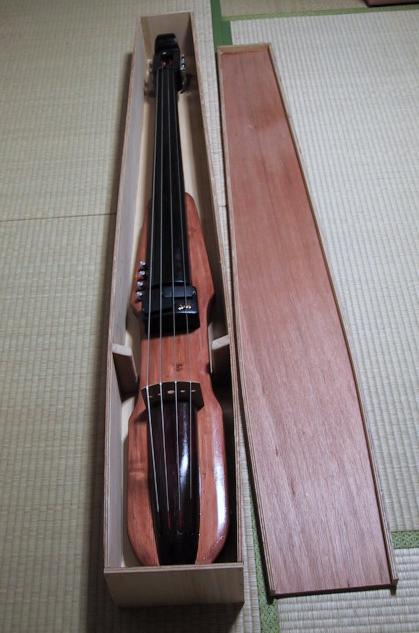
And, I made the case.


I added piezo pick-up on the bridge.
The circuit is like this.

It is the first live of this BASS in 2005.
![]()
Top
![]()